Kitchens often feel like the heart of a home, where meals come together and conversations flow. Yet, over time, that space can start to look tired backsplash , especially the area behind counters and sinks. A backsplash upgrade offers a quick way to bring new life without breaking the bank. In this post, readers will find practical tips on affordable options, from simple DIY projects to smart material choices. Expect step-by-step advice, cost-saving tricks, and ideas that fit various styles, all aimed at making kitchens brighter and more functional.
Understanding Backsplash Basics
This section covers the fundamentals of what a backsplash does and why it matters in kitchen design.
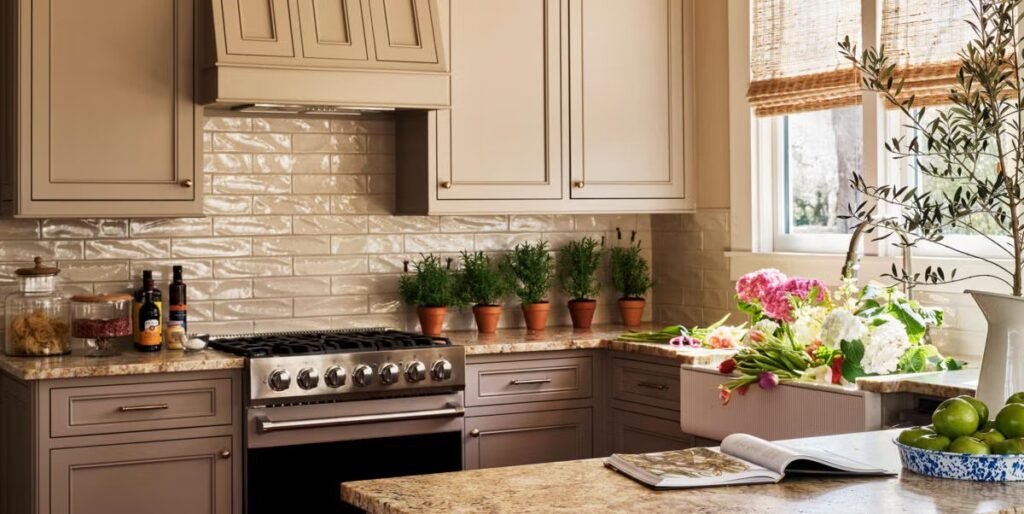
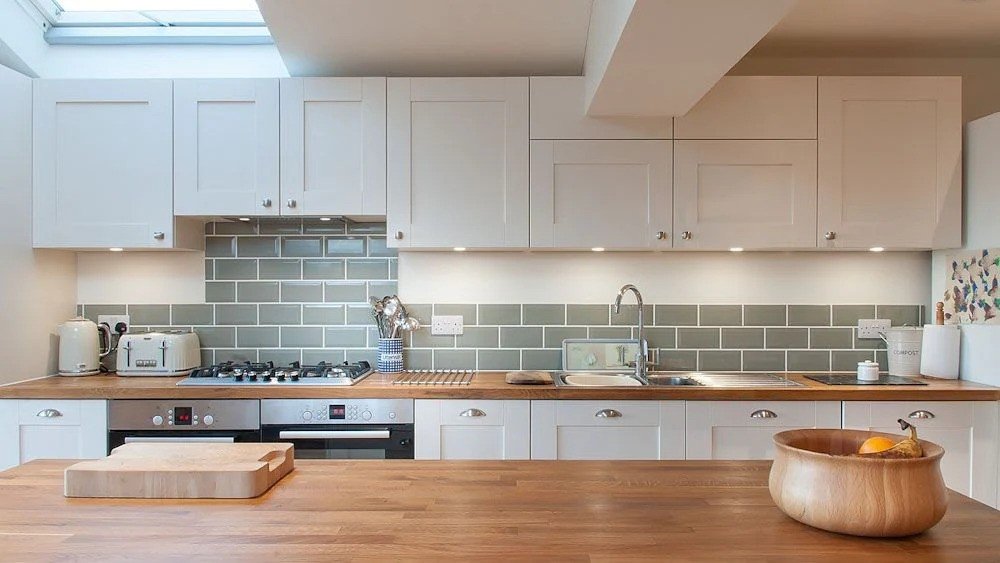
A backsplash protects walls from splatters, moisture, and stains while adding style to the room. It sits between countertops and upper cabinets, usually covering 18 to 24 inches in height. Materials range from tiles to laminates, but the key lies in picking something durable yet easy to install. For those on a tight budget, focus on options that resist heat and water without needing pro help. Think about how it ties into existing counters and cabinets for a cohesive look. Upgrading this spot can make the entire kitchen seem updated, even if other elements stay the same. (72 words)
Many people overlook backsplashes until they notice grime buildup or outdated patterns. A fresh one not only cleans up easier but also boosts the room’s appeal. Consider factors like lighting and color schemes when planning. Light tones can open up small spaces, while bolder choices add personality. Budget versions mimic high-end looks, like subway tiles or stone, at a fraction of the cost. Start by measuring the area accurately to avoid waste. Tools needed might include a level, adhesive, and a utility knife. With careful prep, anyone can tackle this project over a weekend. (85 words)
Benefits of Low-Cost Upgrades
Here, learn about the advantages of choosing inexpensive backsplash changes over full renovations.
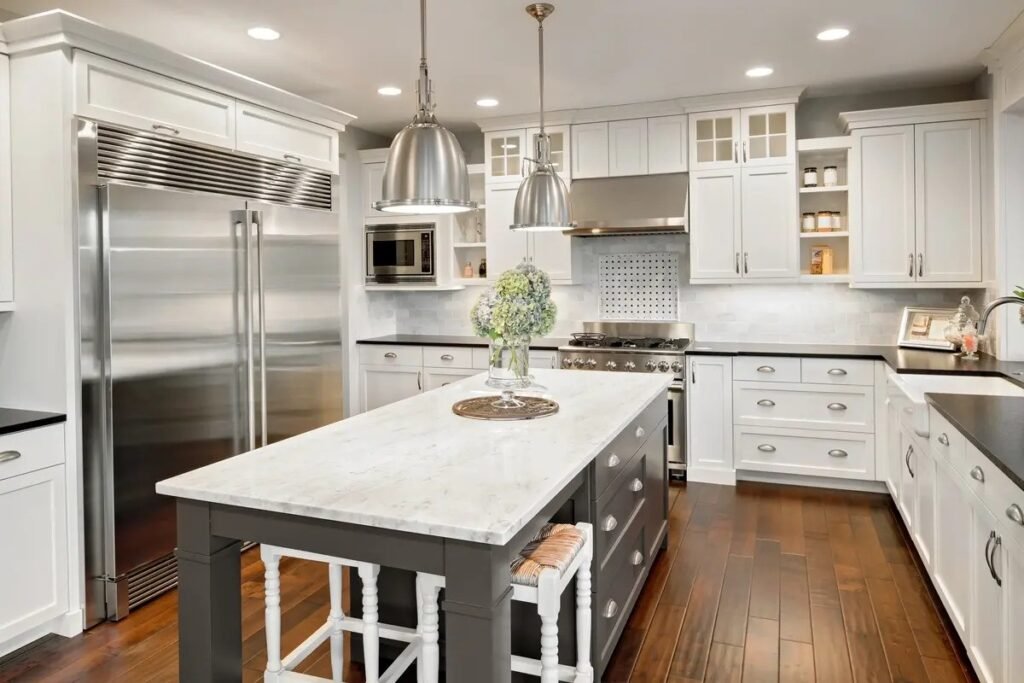
Affordable backsplash updates save money while delivering big visual impact. Instead of spending thousands on a complete remodel, a few hundred dollars can transform the space. These changes are reversible, ideal for renters or those testing styles. They also improve hygiene by creating smooth surfaces that wipe clean quickly. Energy efficiency might even increase if reflective materials brighten the area, reducing the need for extra lights. Overall, such projects build confidence in home improvement skills and encourage more tweaks around the house. (78 words)
One major plus involves time savings. Professional installations can take days, but budget DIY methods finish in hours. This means less disruption to daily routines. Environmentally, opting for recycled or reusable materials cuts down on waste. For families, a updated backsplash can inspire healthier cooking habits by making the kitchen more inviting. Sellers often see higher home values with these minor enhancements, as buyers notice fresh details first. Track expenses to stay under budget, and compare prices from local stores or online suppliers for the best deals. (82 words)
Peel-and-Stick Tile Options
This part discusses easy-to-apply tiles that stick on without mess or special tools.
Peel-and-stick tiles provide a straightforward solution for backsplash refreshes. Made from vinyl or composite materials, they come in sheets or individual pieces that adhere directly to walls. Patterns include faux marble, brick, or mosaic designs, giving a premium feel at low cost. Prep the surface by cleaning it thoroughly to ensure strong adhesion. Cut tiles with scissors or a knife for custom fits around outlets. Prices start around $5 per square foot, making them accessible for most budgets. Remove them later without damage if needed. (84 words)
Installation begins with planning the layout on paper. Align tiles from the center outward for symmetry. Use a spacer for even grout lines if the design calls for it. After sticking, press firmly with a roller to eliminate bubbles. Some brands offer waterproof versions perfect for sink areas. Mix and match colors for unique patterns that reflect personal taste. Clean with mild soap to maintain the look. Over time, these tiles hold up well in moderate-use kitchens, though heavy cooking might require occasional touch-ups. (79 words)
Painting Existing Backsplashes
Explore how a fresh coat of paint can revive old tiles or walls affordably.
Painting stands out as one of the cheapest ways to update a backsplash. Use epoxy or tile-specific paints that bond well and resist chipping. Sand the surface lightly first for better grip, then apply primer if the material demands it. Choose colors that complement cabinets and appliances for harmony. A single gallon covers most average kitchens, costing under $50. Tools include brushes, tape, and drop cloths to protect surroundings. The result? A custom look that feels brand new without removal hassles. (82 words)
For glossy tiles, degrease them with a strong cleaner before starting. Apply thin layers to avoid drips, allowing drying time between coats. Stencils add patterns like geometrics or florals for extra flair. Heat-resistant formulas work best near stoves. This method suits smooth surfaces but might not last on heavily textured ones. Test a small area first to check adhesion. Maintenance involves gentle wiping; avoid abrasive scrubbers. With proper care, painted backsplashes endure for years, offering flexibility to repaint as trends change. (78 words)
Using Removable Wallpaper
This section looks at wallpaper designed for kitchens that peels off cleanly.
Removable wallpaper brings patterns and textures to backsplashes without commitment. Vinyl-coated types resist moisture and grease, ideal for cooking zones. Designs range from subtle geometrics to bold prints, fitting modern or rustic vibes. Measure and cut strips precisely, then smooth them on starting from the top. Bubbles disappear with a squeegee tool. Costs hover around $20 per roll, covering ample space. Unlike permanent options, this allows easy swaps for seasonal updates or moves. It hides imperfections on walls too. (79 words)
Prep by filling any holes and wiping down the area. Overlap edges slightly for seamless coverage. Around edges, use a craft knife for neat trims. Some wallpapers feature heat-resistant layers for stove backs. Pair with clear sealant sprays for added protection against splashes. Cleaning requires a damp cloth; no harsh chemicals. This approach appeals to creative types who enjoy experimenting. If the pattern fades, simply replace sections. Overall, it delivers style on a dime with minimal effort. (74 words)
Faux Stone or Brick Panels
Discover lightweight panels that imitate natural materials at budget prices.
Faux panels made from foam or plastic replicate stone or brick looks convincingly. They install with adhesive or screws, covering large areas quickly. Weights are low, so no extra wall support needed. Textures add depth, making kitchens feel warmer. Prices begin at $10 per panel, economical for full walls. Cut with a saw for fittings around fixtures. Varieties include rustic red brick or sleek gray stone, suiting different decors. Durability handles daily wear in busy homes. (76 words)
Start installation by marking level lines on the wall. Apply construction adhesive generously, then press panels in place. Joints hide with caulk for a pro finish. Waterproof options prevent mold in humid spots. Combine with lighting to highlight textures. Maintenance wipes away dirt easily. For eco-conscious folks, some panels use recycled content. This upgrade fools guests into thinking it’s real masonry, boosting pride in the space. Switch styles later by removing and replacing without major cleanup. (73 words)
Beadboard or Shiplap Alternatives
This area explains wood-like panels that add charm on a shoestring.
Beadboard sheets offer vertical grooves for a cottage feel, while shiplap mimics horizontal planks. Both come in affordable PVC or MDF versions that resist moisture. Paint them any color to match themes. Installation uses nails or glue, finishing in a day. Costs stay under $2 per square foot. They cover uneven walls nicely, hiding flaws. Add trim molding for polished edges. These materials bring texture without the weight of real wood, keeping things light. (74 words)
Measure heights accurately before cutting. Sand edges smooth for safety. Prime if painting to seal pores. Near water sources, opt for mold-resistant types. This style works in farmhouse or coastal kitchens especially well. Clean with soft brushes to avoid scratches. Layer with shelves for functional display. The result creates a cozy backdrop that invites gathering. For renters, adhesive versions remove cleanly. Experiment with stains for varied tones, adding warmth to cooler spaces. (71 words)
Mosaic Tile Sheets on a Budget
Learn about pre-arranged tile sheets that simplify intricate designs.
Mosaic sheets group small tiles on mesh backing for easy application. Budget lines use glass or ceramic in affordable packs. Patterns like hexagons or arabesques add interest without complexity. Grout fills gaps after setting, sealing against leaks. Start at $3 per square foot. Tools include trowels and spacers. This method achieves artistic looks fast. Mix colors for custom accents behind key areas like stoves. Durability suits high-traffic kitchens. (72 words)
Level the base wall first. Spread thin-set mortar evenly, then press sheets in. Cut borders with nippers. Allow grout to cure before use. Waterproof grout prevents stains. This upgrade elevates simple counters dramatically. Clean mosaics with non-acidic solutions. For small spaces, lighter mosaics expand visually. The process builds skills for future projects. Guests often compliment the detail, making it worth the effort. (65 words)
Incorporating LED Lighting
This section covers adding lights under cabinets to highlight new backsplashes.
LED strips or pucks illuminate backsplashes, enhancing colors and textures. Battery or plug-in types keep costs low, around $15 per set. Stick them along cabinet undersides for even glow. Dimmers adjust brightness for moods. This addition makes tasks easier while showcasing the upgrade. Warm whites suit cozy feels, cool for modern. Installation takes minutes with adhesive backs. Energy use stays minimal, saving on bills. (68 words)
Plan placement to avoid shadows. Connect strips in series for longer runs. Remote controls add convenience. Pair with reflective backsplashes for amplified effect. Safety means using low-voltage options. Clean lights gently to maintain output. This tweak turns ordinary updates into standout features. Evenings in the kitchen become more enjoyable with soft lighting. For tech fans, app-controlled versions exist at slightly higher prices. (64 words)
Maintenance Tips for Longevity
Find out how to keep backsplashes looking fresh with simple care routines.
Regular cleaning prevents buildup on budget materials. Use vinegar solutions for natural shine on tiles or paint. Avoid scouring pads that scratch surfaces. Seal grout lines yearly to block moisture. For peel-and-stick, check edges for lifting and re-press. Wipe spills promptly to stop stains. Gentle methods extend life spans significantly. Organize cleaning supplies nearby for quick access. These habits ensure the upgrade lasts through years of use. (70 words)
Inspect for damage monthly, fixing small issues early. In humid climates, fans help dry areas faster. Rotate cleaning products to prevent residue. For painted ones, touch up chips with matching color. This proactive care saves replacement costs. Teach family members proper habits too. Well-maintained backsplashes retain appeal, supporting home value. Simple routines fit busy schedules without much time. (62 words)
Cost Comparison and Savings Strategies
This part breaks down expenses and ways to cut them further.
Compare options: Peel-and-stick at $100 for average kitchens, paint under $50, panels around $150. Shop sales or bulk buys to lower totals. Reuse tools from past projects. Measure twice to minimize waste. Free samples help decide without buying full amounts. Local hardware stores often match online prices. Factor in time as a non-monetary cost. Smart planning keeps everything under $200 easily. (68 words)
Hunt for discounts on apps or newsletters. Secondhand sites offer leftover materials cheap. Group purchases with friends split costs. Rent tools if buying seems wasteful. Calculate square footage precisely online. These tactics stretch budgets further. Track spending in a notebook for future reference. Savings allow splurges on accents like hardware. The goal: Maximum impact with minimal outlay. (61 words)
Real-Life Inspiration Stories
Hear about everyday people who transformed kitchens affordably.
One homeowner painted dated tiles white, brightening a dark space for $40. Another used peel-and-stick mosaics to add color, finishing in an afternoon. A renter chose removable wallpaper in florals, peeling it off when moving. Families report more enjoyment in updated areas. These examples show accessible changes for all skill levels. Photos (imagined here) reveal before-and-after differences starkly. Motivation comes from seeing others succeed similarly. (68 words)
A couple installed faux brick panels, creating a loft vibe on $120. They shared tips online, inspiring neighbors. Challenges like uneven walls got solved with fillers. Satisfaction from DIY boosts morale. Stories highlight creativity over perfection. Adapt ideas to personal needs for best results. Community forums offer more tales and advice. (56 words)
Conclusion
Budget-friendly backsplash upgrades prove that small changes yield big results in kitchens. From peel-and-stick tiles to painted refreshes, options abound for every taste and skill level. These ideas not only protect walls but also infuse personality and function into daily spaces. With careful planning and simple tools, anyone can achieve a transformed look without overspending. Try one project to see the difference it makes. Kitchens become more welcoming, encouraging time spent cooking and connecting. Remember, the best updates fit lifestyles while staying practical and affordable.